 Starvard.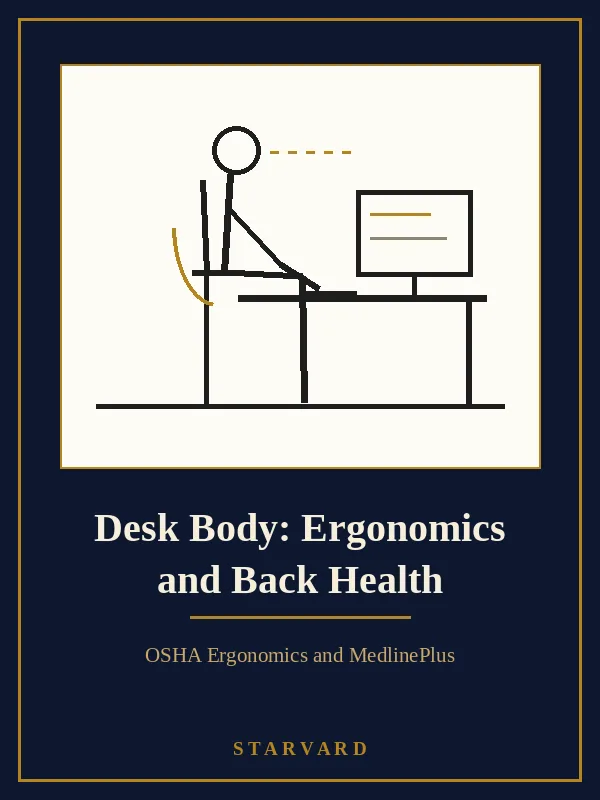
Starvard University · Desk Body: Ergonomics and Back Health
You will set up your workspace and daily habits so your back, neck, and wrists stop hurting. This course is education only, not medical advice. It is plain and practical, built from guidance by OSHA and MedlinePlus.


Hello, my name is Finn, and I'm going to help you understand this course.
Here it is, explained like you are 10:
If you sit at a desk all day, your body can start to ache. Your back gets stiff, your neck feels tight, and your wrists and eyes get tired. Most of the time the fix is not fancy gear. It is how your chair, desk, and screen are set up, plus moving more during the day. This course helps you set up your workspace step by step and build small habits that help your body feel better at work.
OSHA, the federal workplace safety agency, teaches neutral body positioning: joints naturally aligned, wrists straight, shoulders relaxed, back fully supported, and feet flat on the floor or a footrest. Its computer workstations eTool adds a warning worth remembering: even perfect posture held still for hours is not healthy, so you should change position, stretch, and walk around during the day. MedlinePlus describes ergonomics the same way, as finding the best fit between you and your job conditions so you are safe, comfortable, and less prone to injury.
This course is education only, not medical advice, and it does not diagnose the cause of anyone's pain. It covers setup, laptops on a budget, eyes, movement breaks, lifting, and what generally helps low back pain, and it tells you plainly when to see a professional instead. Work through it at your own desk, one adjustment at a time.
The whole course in brief
What you will be able to do after this course
The ten lessons
Lesson 1
Your body was built to move, and desk work asks it to hold still. OSHA explains that ergonomics is fitting the job to the person, and that musculoskeletal disorders affect the muscles, nerves, blood vessels, ligaments, and tendons. Risk grows with awkward body postures, repeating the same tasks, and holding one position for long periods. Sitting at a computer combines all three: a fixed posture, the same small hand and arm movements for hours, and too little recovery time between them.
The aches follow a pattern you can probably recognize. A screen that is too low pulls your head forward and loads your neck. A chair without back support lets you slump, which strains the low back that, as MedlinePlus notes, supports most of your body weight. Wrists bent up or sideways while typing stress the tendons that run through them. None of this requires one dramatic injury. MedlinePlus makes the same point about back pain generally: often no single event causes it; you may have been sitting or lifting in strained ways for a long time before one ordinary movement finally hurts.
The hopeful part is that most of these risks are adjustable. OSHA notes that work related musculoskeletal disorders can be prevented, and that applying ergonomic principles can substantially reduce them. That is the work of this course: fit the desk to your body, vary your posture, and move more. This course is education only, not medical advice. It explains general principles from OSHA and MedlinePlus; it cannot tell you why your own back hurts. For pain that persists, lesson 9 explains when to bring in a professional.
Lesson 2
Start with the idea OSHA puts first: neutral body positioning. In a neutral posture your joints are naturally aligned, which reduces stress and strain on muscles, tendons, and the skeletal system. For sitting at a computer, OSHA describes it this way: your back is fully supported with appropriate lumbar support, your thighs and hips are supported and generally parallel to the floor, your knees are about the same height as your hips with your feet slightly forward, and your feet are fully supported by the floor, or by a footrest if the desk height is not adjustable.
Set the chair first, because everything else follows from it. Adjust the height so your feet rest flat, then sit back so the chair supports your lower back; a small cushion or rolled towel can supply lumbar support if the chair lacks it. Your head should be level, forward facing, and balanced, in line with your torso, and your shoulders relaxed with upper arms hanging normally at your sides. Elbows stay close to the body. If the chair has armrests, they should support without shrugging your shoulders up.
Now place the monitor. The OSHA computer workstations eTool gives quick guidance used in its checklist: top of the monitor at or just below eye level, head and neck balanced and in line with the torso, lower back supported, wrists and hands in line with forearms, adequate room for keyboard and mouse, and feet flat on the floor. Put the screen directly in front of you, far enough away that you can read comfortably without leaning in, and angle it to cut glare from windows and lights. Change one thing at a time, sit with it for a day, and adjust again. Fit is personal, and small changes compound.
Lesson 3
Your hands do the most repetitive work at a desk, so small misalignments repeat thousands of times a day. OSHA neutral positioning for the hands is clear: hands, wrists, and forearms are straight, in line, and roughly parallel to the floor. Elbows stay close to the body and bent between 90 and 120 degrees, with shoulders relaxed. MedlinePlus gives the same idea from the other side: adjusting the position of your computer keyboard is an ergonomic change that helps prevent wrist problems, and good posture matters in whatever you do.
Set the keyboard directly in front of you, close enough that you do not reach for it, at a height that lets your wrists float straight rather than bend up, down, or sideways. Typing with a bent wrist squeezes the tendons as they slide through the wrist, which is why the straight, relaxed position matters. If you use a wrist or palm support, follow the pattern in the OSHA materials that MedlinePlus points to: rest on it during pauses, not while you are actively typing, so your wrists are not pressed and bent at the same time.
Place the mouse right beside the keyboard, at the same height, close to your body, so you are not reaching out or twisting your shoulder for it all day. Keep your grip light, move the mouse with your whole arm rather than flicking your wrist sideways, and switch tasks when your hands start to feel tired. MedlinePlus defines the goal of ergonomics simply: to make sure you are safe, comfortable, and less prone to work related injuries. Straight wrists, close tools, relaxed shoulders, and regular pauses get you most of the way there.
Lesson 4
A laptop is a compromise in one piece: the screen and keyboard are attached, so if the screen is at the right height, the keyboard is too high, and if the keyboard is comfortable, the screen is too low and your neck bends for hours. The fix follows from the neutral positioning in lesson 2, and it does not require expensive furniture. Raise the laptop on a stable stack of books or a stand so the top of the screen sits at or just below eye level, then use a separate keyboard and mouse at elbow height so your wrists can stay straight.
The chair matters more than the desk. If you work from a kitchen chair, add a cushion to sit on and a small rolled towel or pillow behind your lower back for the lumbar support OSHA describes, and use a box or stack of books as a footrest if your feet dangle, since feet should be fully supported. A dining table that is too high can be offset by sitting higher on cushions and supporting your feet. Light helps too: face a window from the side rather than sitting with bright light directly behind the screen or behind you.
Spend money, if you spend any, in this order: a separate keyboard and mouse first, then lumbar support and a footrest, then a laptop stand. Everything else can be borrowed from around the house. Work through the same checklist as any office: back supported, feet flat, screen at eye level, wrists straight, tools close. A home office built from books, cushions, and one inexpensive keyboard can fit your body better than an expensive desk set up carelessly, because fit, not price, is what your body notices.
Lesson 5
Screens ask your eyes to do something demanding: hold focus at one fixed distance, in one direction, for hours, often in poor light. The results are familiar: tired, dry, or aching eyes, blurred vision after long stretches, and headaches that arrive by afternoon. OSHA computer workstation guidance treats glare and monitor placement as part of workstation fit for exactly this reason, and its checklist includes a clean screen, free from flickering, that can tilt and swivel, positioned so your head can stay in a neutral posture.
Set up the light first. Position the monitor so windows are to the side, not directly in front of or behind the screen, and close blinds when sun strikes the display. Match the screen brightness roughly to the room so your eyes are not adapting between a bright screen and a dark room. Keep the top of the screen at or just below eye level, as in lesson 2, far enough away that you can read without leaning forward, and make the text bigger instead of moving closer. Enlarging the font is an ergonomic adjustment, not a surrender.
Then rest your eyes on a rhythm. Look away from the screen regularly and focus on something far away for a short while, blink fully and often, since people blink less when concentrating on a screen, and get up periodically, which rests your eyes and your back at the same time. If your eyes stay strained despite good light, distance, and breaks, or your vision changes, get your eyes checked rather than pushing through. Screen habits can reduce strain a great deal, but they are not a substitute for an eye exam when something has actually changed.
Lesson 6
Here is the part of ergonomics people skip, and OSHA states it plainly: regardless of how good your working posture is, working in the same posture or sitting still for prolonged periods is not healthy. You should change your working position frequently throughout the day. OSHA suggests making small adjustments to your chair or backrest, stretching your fingers, hands, arms, and torso, standing up and walking around for a few minutes periodically, and performing some tasks standing, such as reading, phone calls, or meetings.
Breaks fail when they depend on willpower, so give them a trigger instead. Tie movement to things that already happen: stand during phone calls, walk to get water, take the long way to the printer, and stand or stroll for two minutes whenever you finish a task or send a batch of messages. A gentle timer can help at first. During a break, simple general movements are enough: roll your shoulders, gently turn your head from side to side, open and close your hands, and walk. Keep every stretch gentle and general, in a comfortable range. Stop if it hurts.
Think of movement as spread through the day rather than saved for the evening. A workout after work is valuable, and it does not cancel eight still hours; your back, neck, and circulation need variety during those hours too. Start embarrassingly small if you need to: one stand and walk per hour, every day, beats an ambitious plan abandoned by Wednesday. Within a week or two, most people find the breaks stop feeling like interruptions. They become the moments your body was quietly asking for all along, and afternoon aches often ease first.
Lesson 7
Backs are injured by lifting more often than by sitting, and the technique is teachable. MedlinePlus teaches proper lifting this way: warm up or stretch your muscles before you lift heavy objects, know your limits, and do not try to lift objects that are too heavy. Spread your feet apart, around the width of your shoulders, to give your body a wide base of support. Stand as close as possible to the object, and bend at your knees. Tighten your stomach muscles and lift slowly, using your hip and knee muscles, holding the object as close to your body as you can.
Two details do much of the protective work. The first is closeness: a load held at arm length pulls far harder on your low back than the same load hugged to your body, which is why MedlinePlus says to hold the object as close as you can. The second is twisting: do not twist your back when you bend to reach or lift, and turn with your feet instead. To set the object down, reverse the motion: squat with a straight back, using the muscles in your hips and knees, rather than folding forward and dropping the load.
Plan the lift before you start. Clear the path, check the weight with a small test lift, split heavy loads into lighter trips, and ask for help or use a cart, dolly, or hand truck when the load is too heavy or awkward for one person. MedlinePlus includes learning the right way to lift heavy objects among its core ergonomic changes for preventing back injuries. That applies at home as much as at work: laundry baskets, children, luggage, and bags of soil all count as loads, and your legs are the strongest lifting muscles you own. Use them.
Lesson 8
Low back pain is remarkably common. MedlinePlus reports that back pain affects 8 out of 10 people at some point during their lives, and that the low back is the most commonly affected area because it supports most of your body weight. Pain may be a dull, constant ache or a sudden, sharp pain. Acute back pain comes on suddenly and usually lasts from a few days to a few weeks, while back pain is called chronic if it lasts for more than three months. Often no single event caused it; strained sitting, standing, and lifting habits over a long time can set the stage for one simple movement to trigger pain.
What generally helps is less dramatic than people expect. MedlinePlus notes that most back pain goes away on its own, though it may take a while. In its summary, treatment depends on the kind of pain and what is causing it, and may include hot or cold packs, exercise, and other approaches. One clear warning stands out: resting can help at first, but staying in bed for more than 1 or 2 days can make it worse. Gentle movement, as tolerated, and gradually returning to ordinary activity fit better with how backs recover than long, strict bed rest.
What tends not to help: waiting in bed for a week, bracing yourself stiffly all day, or hunting for a single magic product or posture that fixes backs in general. This course does not diagnose the cause of anyone's pain, and no general lesson can. This is education only, not medical advice. If your back pain is severe or does not improve after three days, MedlinePlus advises calling your health care provider, and you should also get medical attention if you have back pain following an injury. The next lesson covers those warning signs in full.
Lesson 9
Most desk related aches respond to better setup, movement, and time. Some pain is a signal to stop self managing and get examined. MedlinePlus gives clear starting points for back pain: if your pain is severe, or it does not improve after three days, call your health care provider, and get medical attention if you have back pain following an injury. Pain that keeps returning, keeps worsening, or starts limiting your work, sleep, or walking belongs in that conversation too, even if each episode seems to fade.
Certain symptoms should raise your urgency further. Get care promptly for new weakness in a leg or foot, numbness or tingling that spreads or persists, pain that follows a fall or other trauma, or pain paired with fever or unexplained weight loss. Trouble controlling your bladder or bowels alongside back pain is an emergency warning sign to seek care right away. This lesson cannot list every warning sign and does not diagnose anyone. When in doubt, call. Describing your symptoms to a professional is always a reasonable step, never an overreaction.
Who you see depends on the problem. A primary care doctor is a good first stop for persistent pain, and a physical therapist can assess how you move, sit, and lift, and build a program around your body and your job. For workstation problems, an occupational health or ergonomics professional can evaluate your setup directly. Bring useful information: when it started, what makes it better or worse, what you have tried, and your medicines list. If you have persistent pain, see a doctor or physical therapist rather than continuing to adjust your chair and hope. Professionals exist for exactly the pain that does not settle.
Lesson 10
Everything in this course fits into a day that looks ordinary from the outside. Morning: a few minutes of gentle movement before work, shoulders rolling, a short walk, nothing heroic. When you sit down, run the ten second setup scan: feet flat on the floor or a footrest, back supported, screen top at or just below eye level, keyboard close, wrists straight, shoulders relaxed. That scan, repeated until it is automatic, is the chair, desk, monitor, and wrist lessons compressed into a habit your body will thank you for.
Through the day, let triggers carry the movement lesson: stand for calls, walk for water, stretch your fingers, hands, arms, and torso when you finish a task, and look into the distance to rest your eyes. Keep every stretch gentle and in a comfortable range. Stop if it hurts. When lifting appears in your day, and it always does, use the lifting pattern without thinking: get close, bend your knees, tighten your stomach, lift with your legs, hold the load close, and turn with your feet. At the end of work, a short walk helps mark the boundary between desk time and the rest of your life.
Once a week, do a two minute review. What ached, and when? Did one adjustment help? Is anything getting worse instead of better? Adjust one thing for the coming week rather than rebuilding everything at once. And hold the limit from lesson 9 alongside the routine: if you have persistent pain, see a doctor or physical therapist, because a routine is for everyday care, not a substitute for care you actually need. Your desk body is not a problem to solve once. It is a body to look after daily, in small ways that add up.
Sources
This course is built from the free public guidance of OSHA, the Occupational Safety and Health Administration, and MedlinePlus from the National Library of Medicine. They supply the neutral positioning guidance, the computer workstation checklists, the lifting technique, and the low back pain basics taught here.
Graduation
You learned why sitting still all day hurts, how to set up your chair, desk, monitor, keyboard, and mouse, and how to make a laptop workstation fit on a budget. You practiced resting your eyes, taking movement breaks that actually happen, and lifting with your legs. You learned what generally helps low back pain, when to see a professional, and a daily routine that holds it all together. Start with one adjustment today.
Keep learning
This course is part of Starvard University, striving for greatness.
A note on accuracy: Much of what you read at Starvard was created with help from AI agents, working alongside people. We check what we can, but we cannot guarantee that everything here is true, current, or complete. If something really matters, your health, your money, a grade, a job, please verify it with a trusted source before you rely on it.